Google Sheets
The combination between Google Forms and Google Sheets is a often used, easy to use and time-cost-effective tool to gather information from clients. These services can be used to receive registrations, newsletter sign-ups, basically any piece of information you need from your clients to cooperate with them.
Calling Ninja offers you an easy way to launch a fully automated phone call to any user that submit your form containing their phone number. This way any new entry on your form will receive an instant and fully automated call!
In this tutorial you will see how to set this up on Calling Ninja. If you need help on setting up a form linked to a spreadsheet, head over to our Google Forms-Spreadsheet-linking guide on this.
Requirements
- A Google Forms form that contains a field asking submitters for their phone number
- A Spreadsheet that is linked to aforementioned form (see also: Google Forms-Spreadsheet-linking guide)
- a fully set-up Calling Ninja account. We can help you on that, just contact us via E-Mail
(You can of course use a spreadsheet that is not connected to a form and manually enter data. Calling Ninja only checks for new entries via the spreadsheet. However to further automate your endeavour, we recommend to set up a link between a form and a spreadsheet.)
Steps
These are the steps to follow to successfully set up this integration. Follow from the start, if you have not yet authenticated your Google account on Calling Ninja or jump right to the actual creation of the integration.
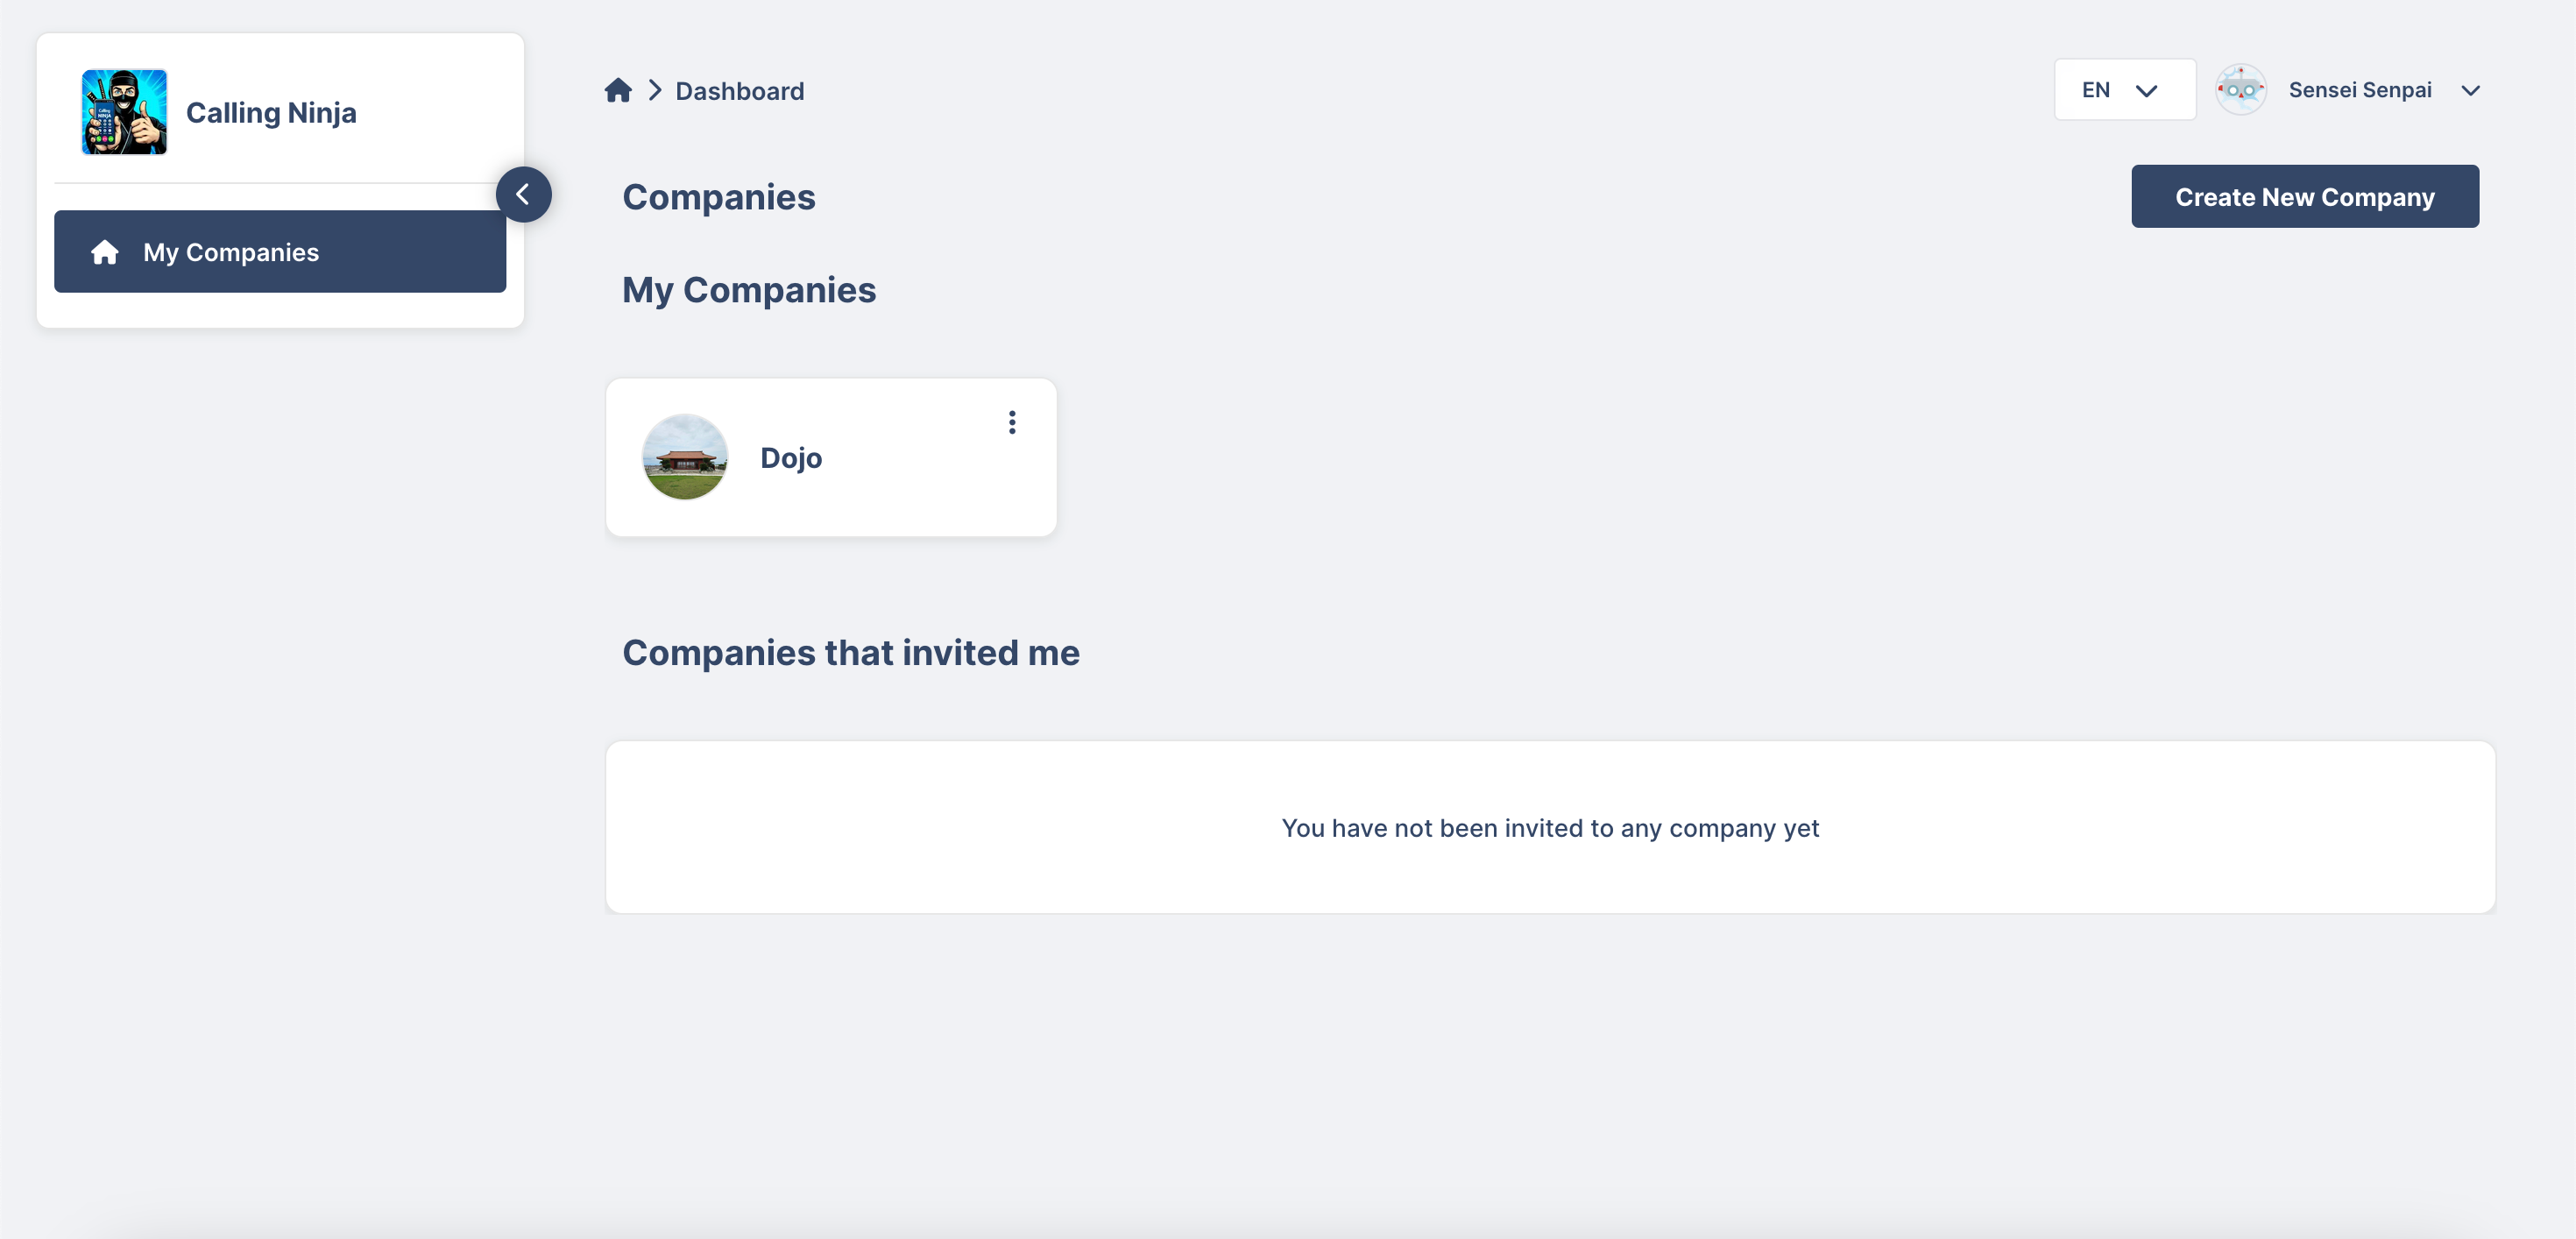
1. Select the company
Integrations, just like everything else at Calling Ninja, live inside of Companies. To get started, select the Company that will hold your Integration:
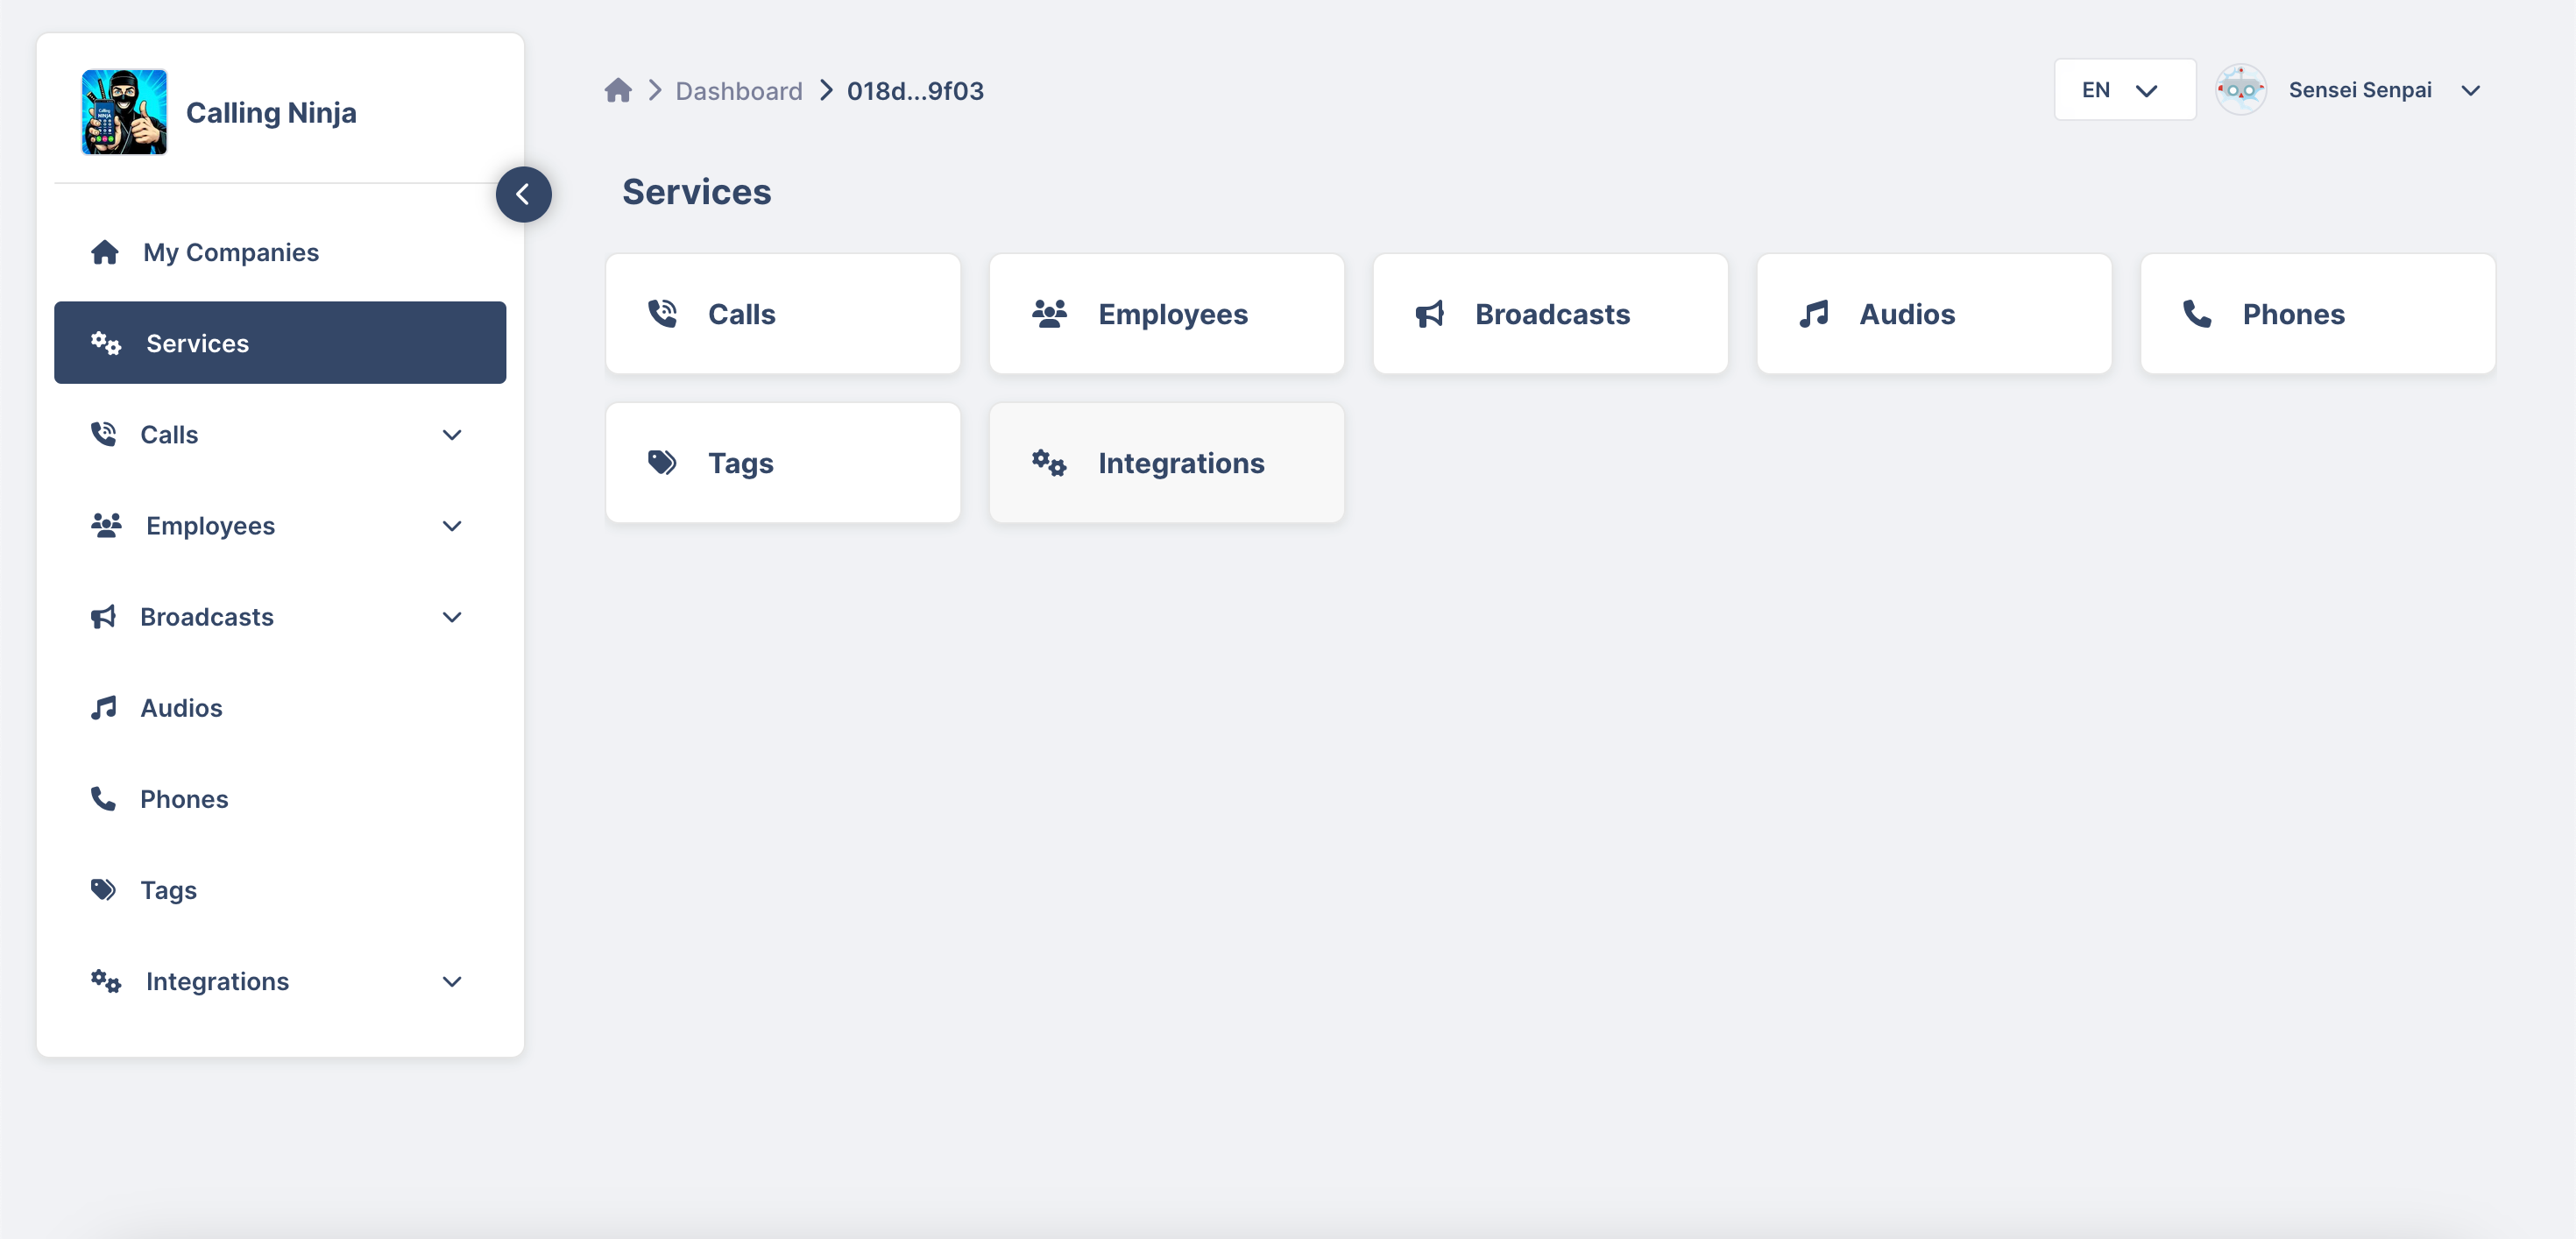
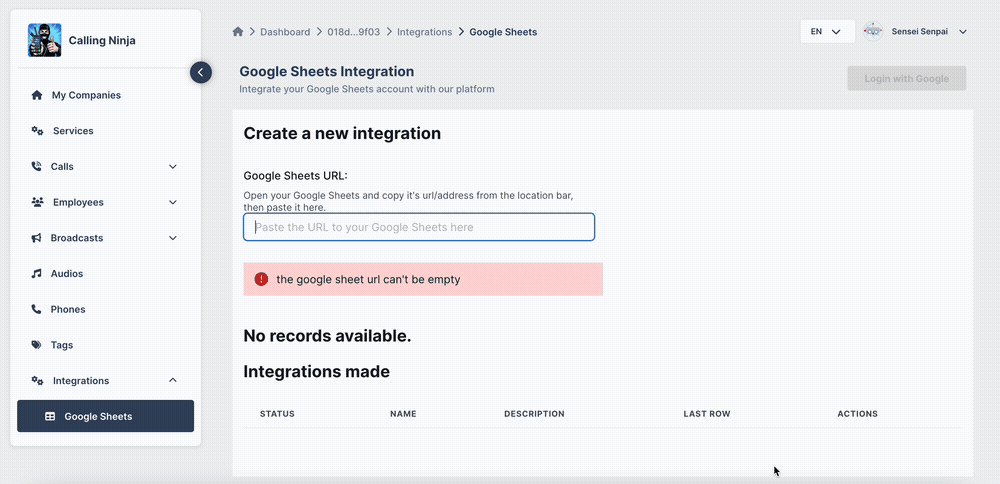
2. Select Integrations - Google Sheets
Inside your Company of choice, navigate to the section Integrations and on to Google Sheets:

3. Authenticate with your Google Account
Upon opening the page for the Google Sheets integration for the first time, you will see a notification that Calling Ninja does not yet have credentials to access your spreadsheets on your behalf. Wait for the notification to disappear and then click on the button labeled "Login with Google". This will open a pop up, where you will have to login to your Google account and show give Calling Ninja access to your Google Drive and Google Sheets1. The process is straight forward:
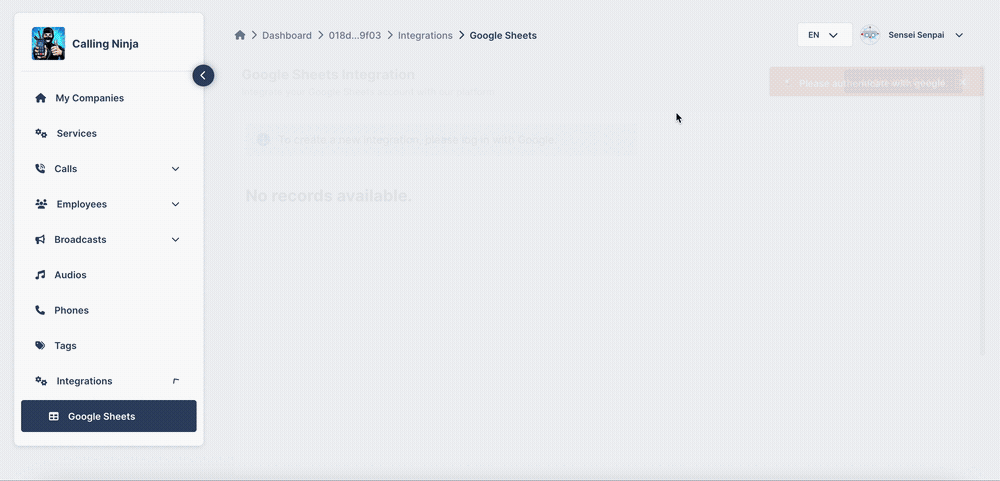 ^ Wait for the notification to disappear and click on the button to login with Google
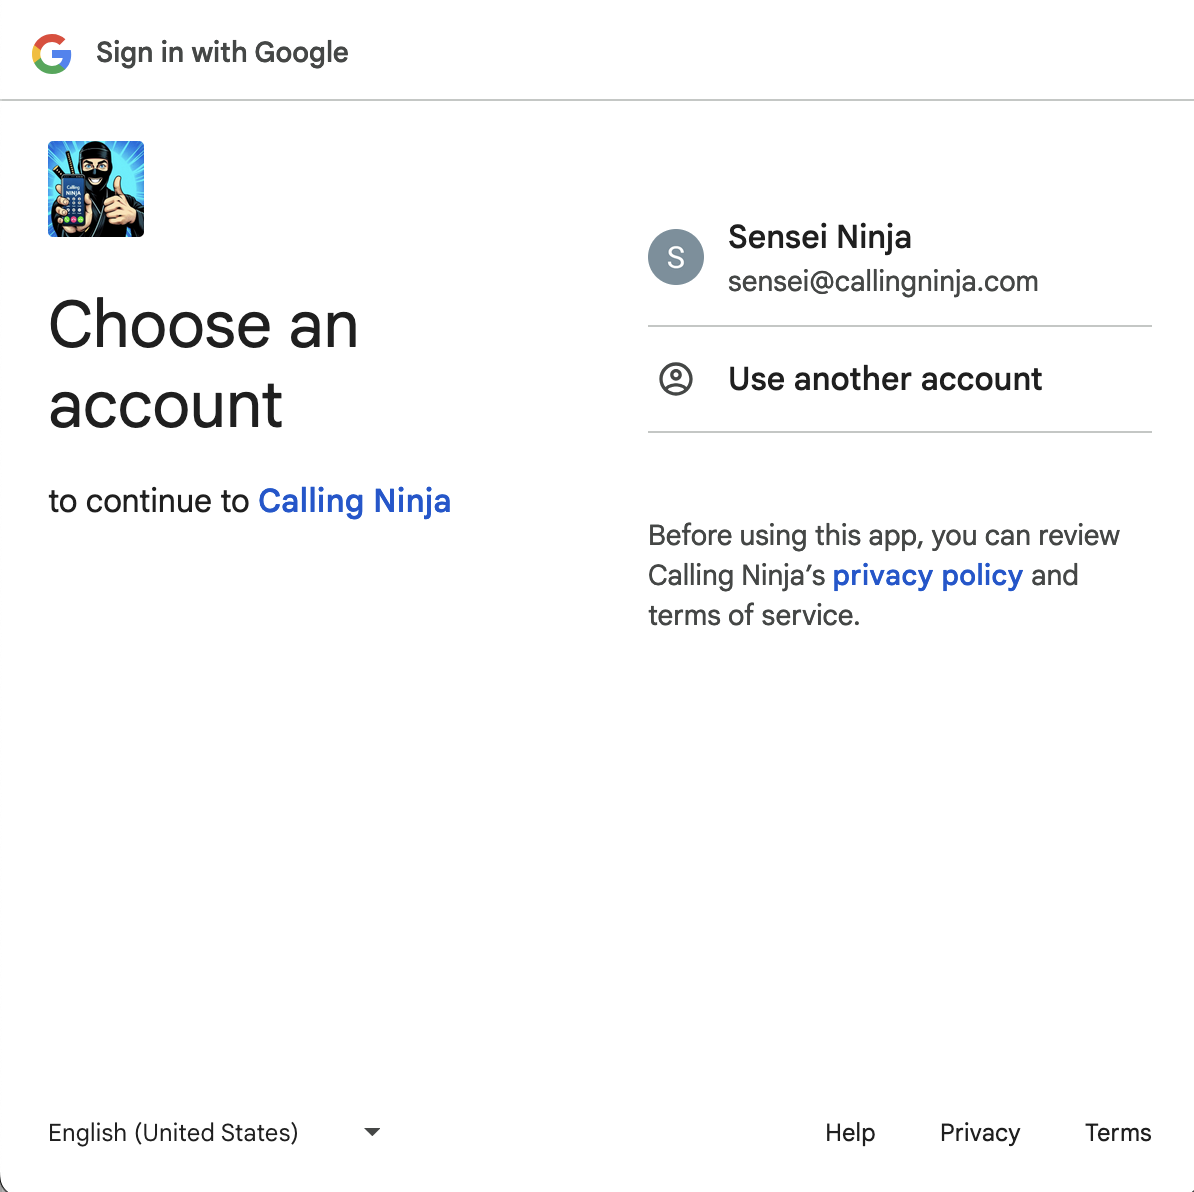 ^ In the pop up, select your Google account or login to one.
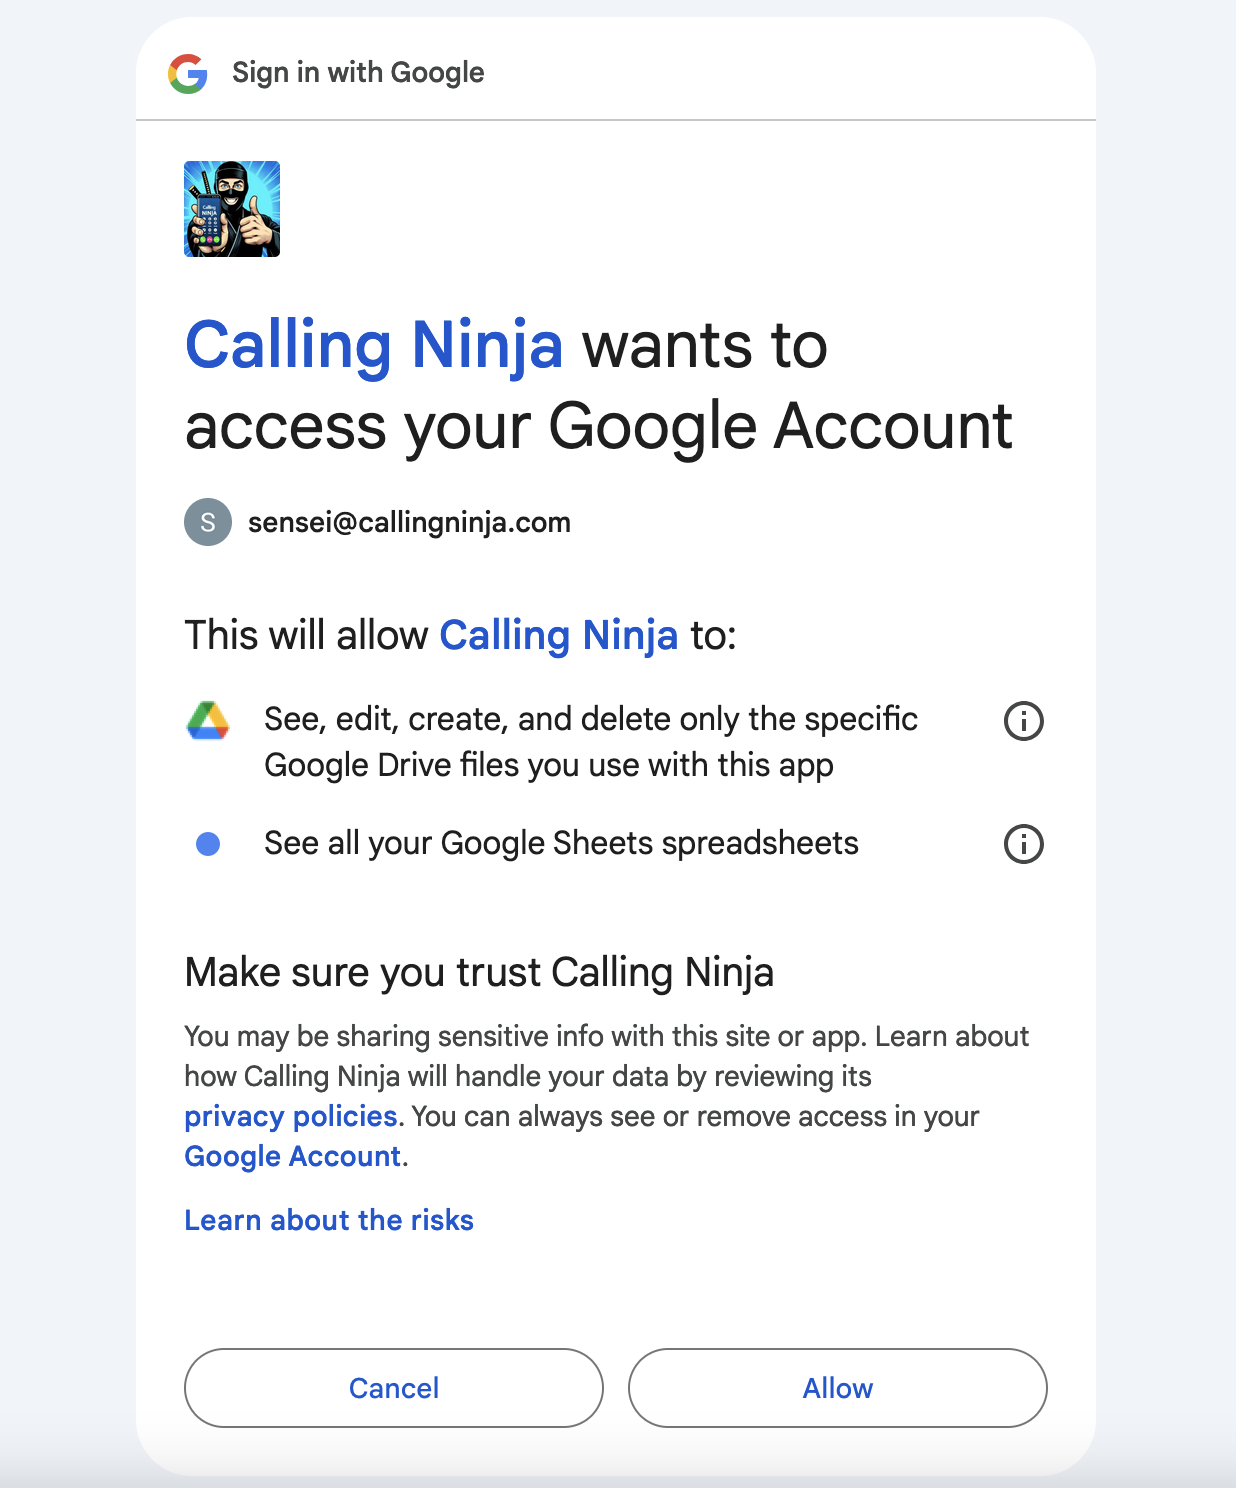 ^ In order to automate your phone calls Calling Ninja needs a bare minimum of access to your Google Drive and Google Sheets. Select
 Allow to proceed and give Calling Ninja access.
4. Select your spreadsheet
After allowing Calling Ninja access to your Google Sheets, head over to the desired spreadsheet and copy its url either from your browser's address bar or from the share link. After copying, you'll have to paste the url into the text field.
 ^ After giving Calling Ninja access through your Google account, the page refreshes and you can proceed to paste the url of a spreadsheet and select a worksheet from that spreadsheet. Having this information there is some more details we need from you.
5. Fill in the details
The information we need from you, is based on how your spreadsheet at Google Sheets is structured. We will show you an example for a newly created spreadsheet with various columns and how to enter the data correctly at Calling Ninja.
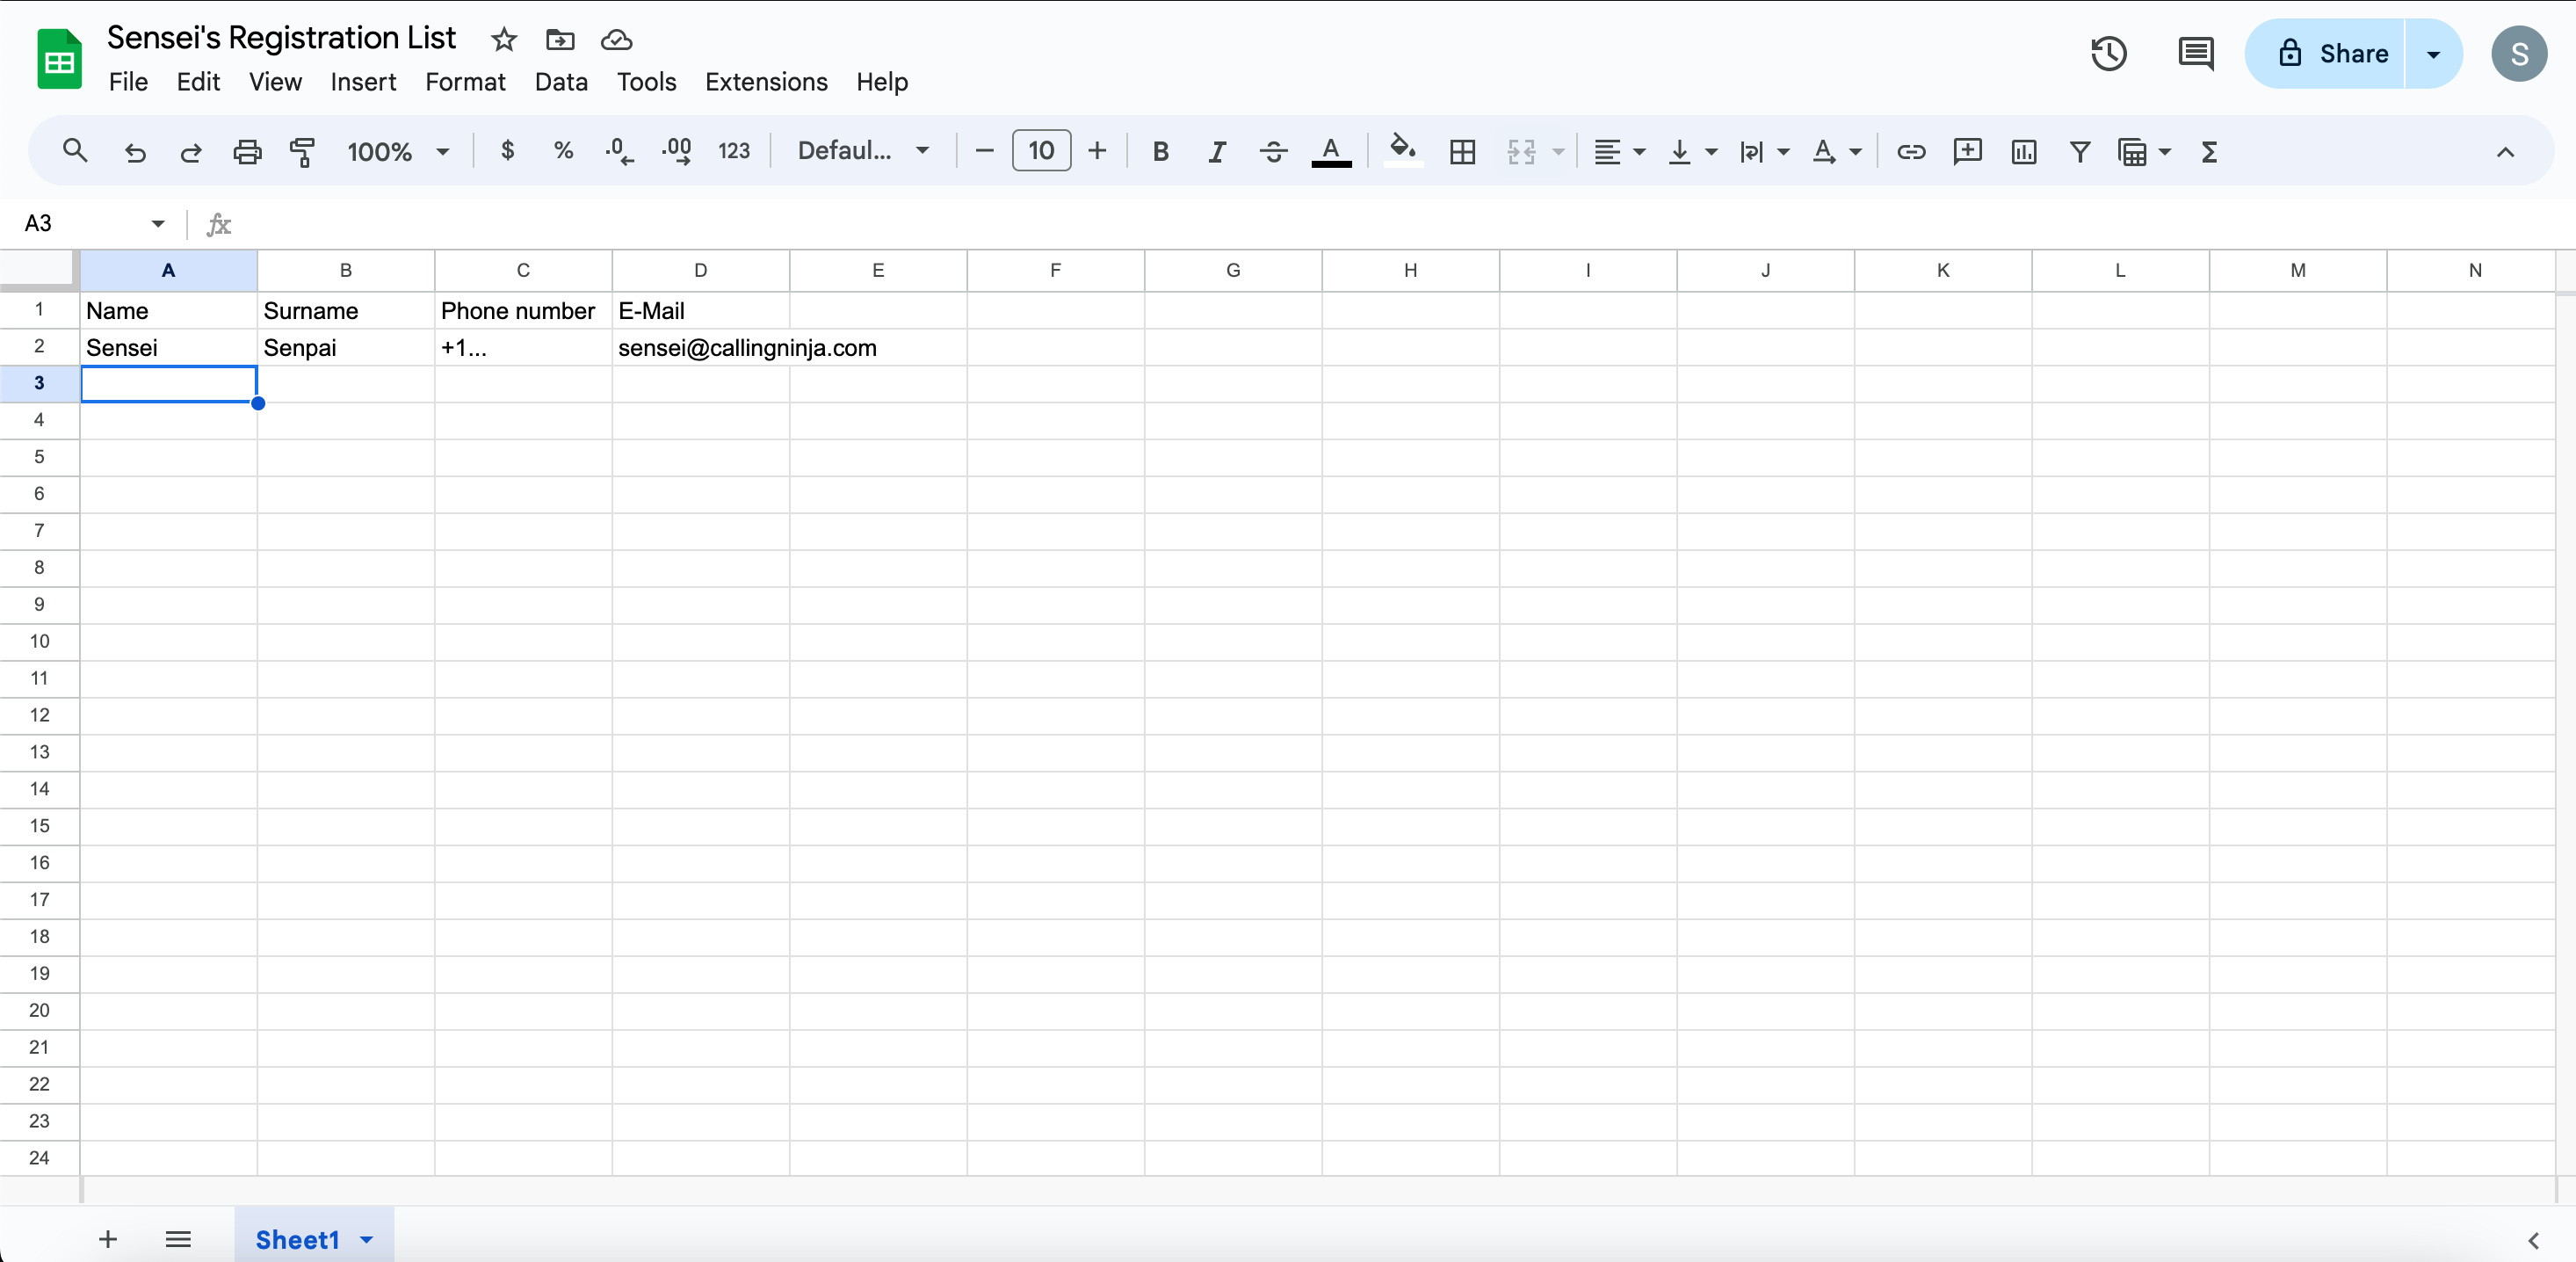 ^ This is how your spreadsheet may look like. There are columns for the most basic data and most importantly for Calling Ninja a column that holds phone numbers in the international format (plus sign followed by country code and actual phone number).
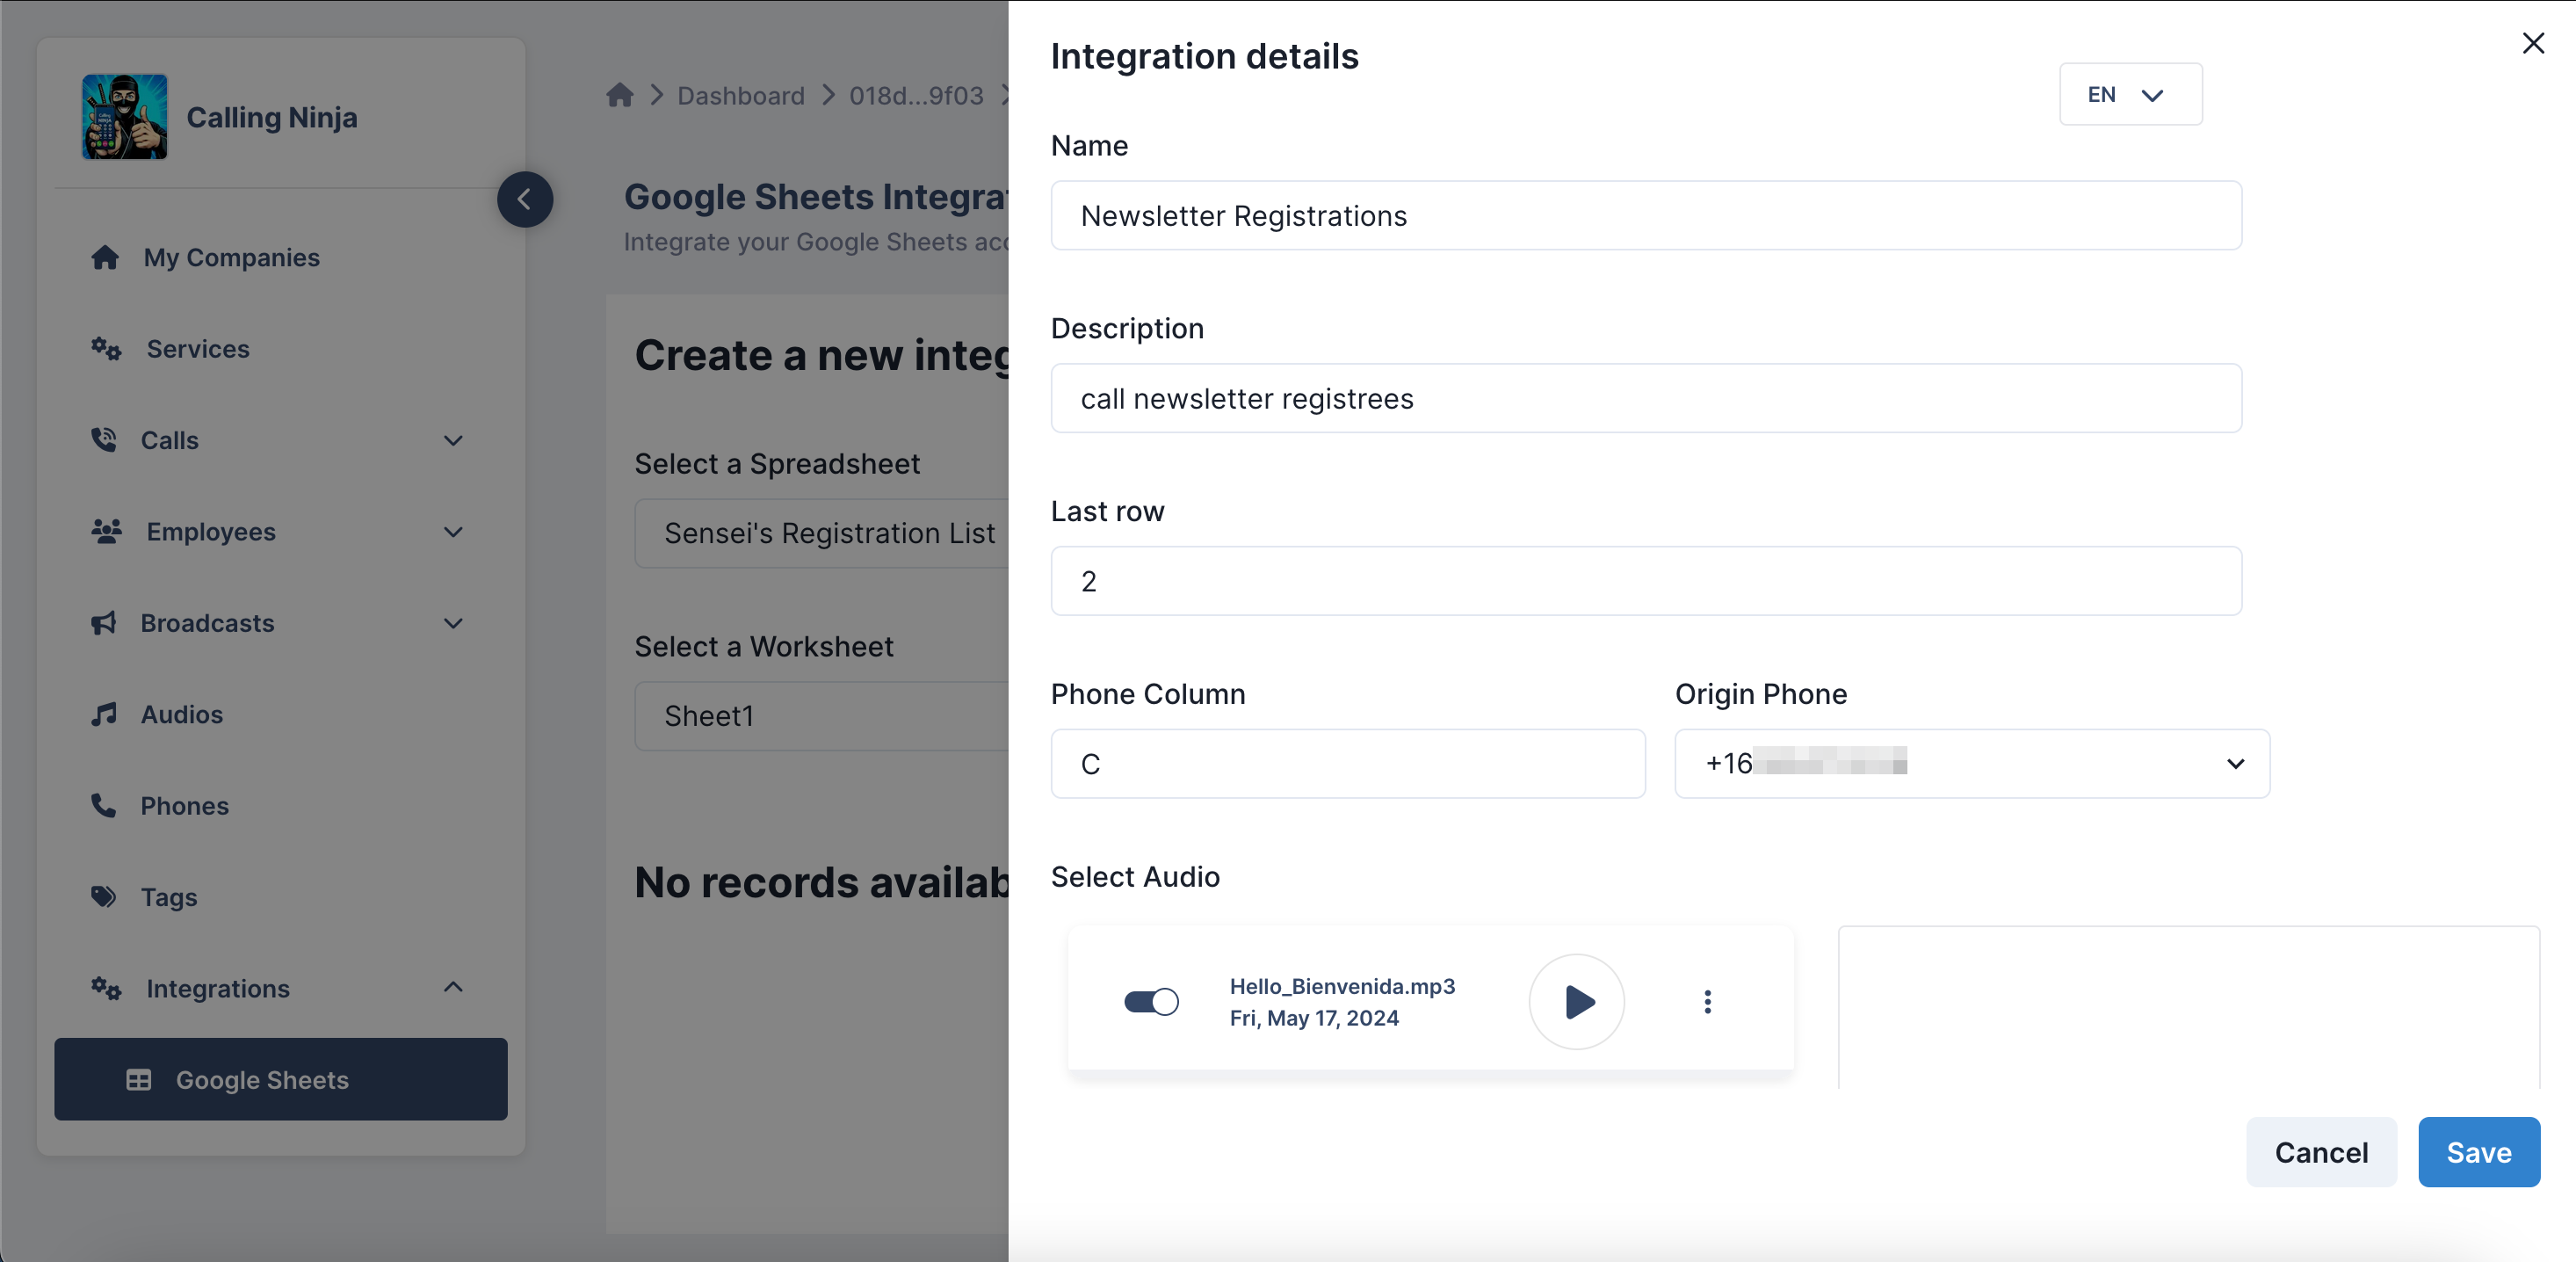 ^ This form is filled out based on the information we extract from the above spreadsheet. First off, choose a name and description that's fitting so you can later on distinguish between your integrations.
Last Row: Since there was already a pre-existing entry in my spreadsheet I chose to not include the entry on line 2. The automation will start calling all entries that are entered after the indicated line (e.g. from line 3 onwards).
Phone Column: The phone column refers to the column in your spreadsheet that will hold all the phone numbers.
Origin Phone: Select a fitting phone number from your Twilio phone numbers.
Audio Message: Last, but not least: Upload or select an appropriate audio that your recipients will hear.
6. Create your integration
Now you can hit that Save button, sit back and relax. Calling Ninja takes over from here and will call all new entries automatically for you!
If you need any further help, please reach out to us via E-Mail!
Footnotes
-
Don't worry, we at Calling Ninja take our responsibilities very seriously and won't meddle with your data! We only read out what we need to automate your phone calls. ↩